Back
Back
Published 2025.08.17
Since Taking Inventory of All the Clocks a few weeks ago, I realized there were unutilized devices that could be used to display the time in my home: I had a CRT television that I occasionally use to play old video games (whose consoles sadly do not have clocks built in) and I had a Raspberry Pi Zero W in a box that I hadn't used in years.
I used these two items to create a new clock. The Raspberry Pi outputs the time in a quirky, randomized fashion to the screen of the CRT. It's set up so it turns on as soon as the power strip that powers the TV is switched on, meaning when the TV is turned on, the clock should come alive and start showing the time.
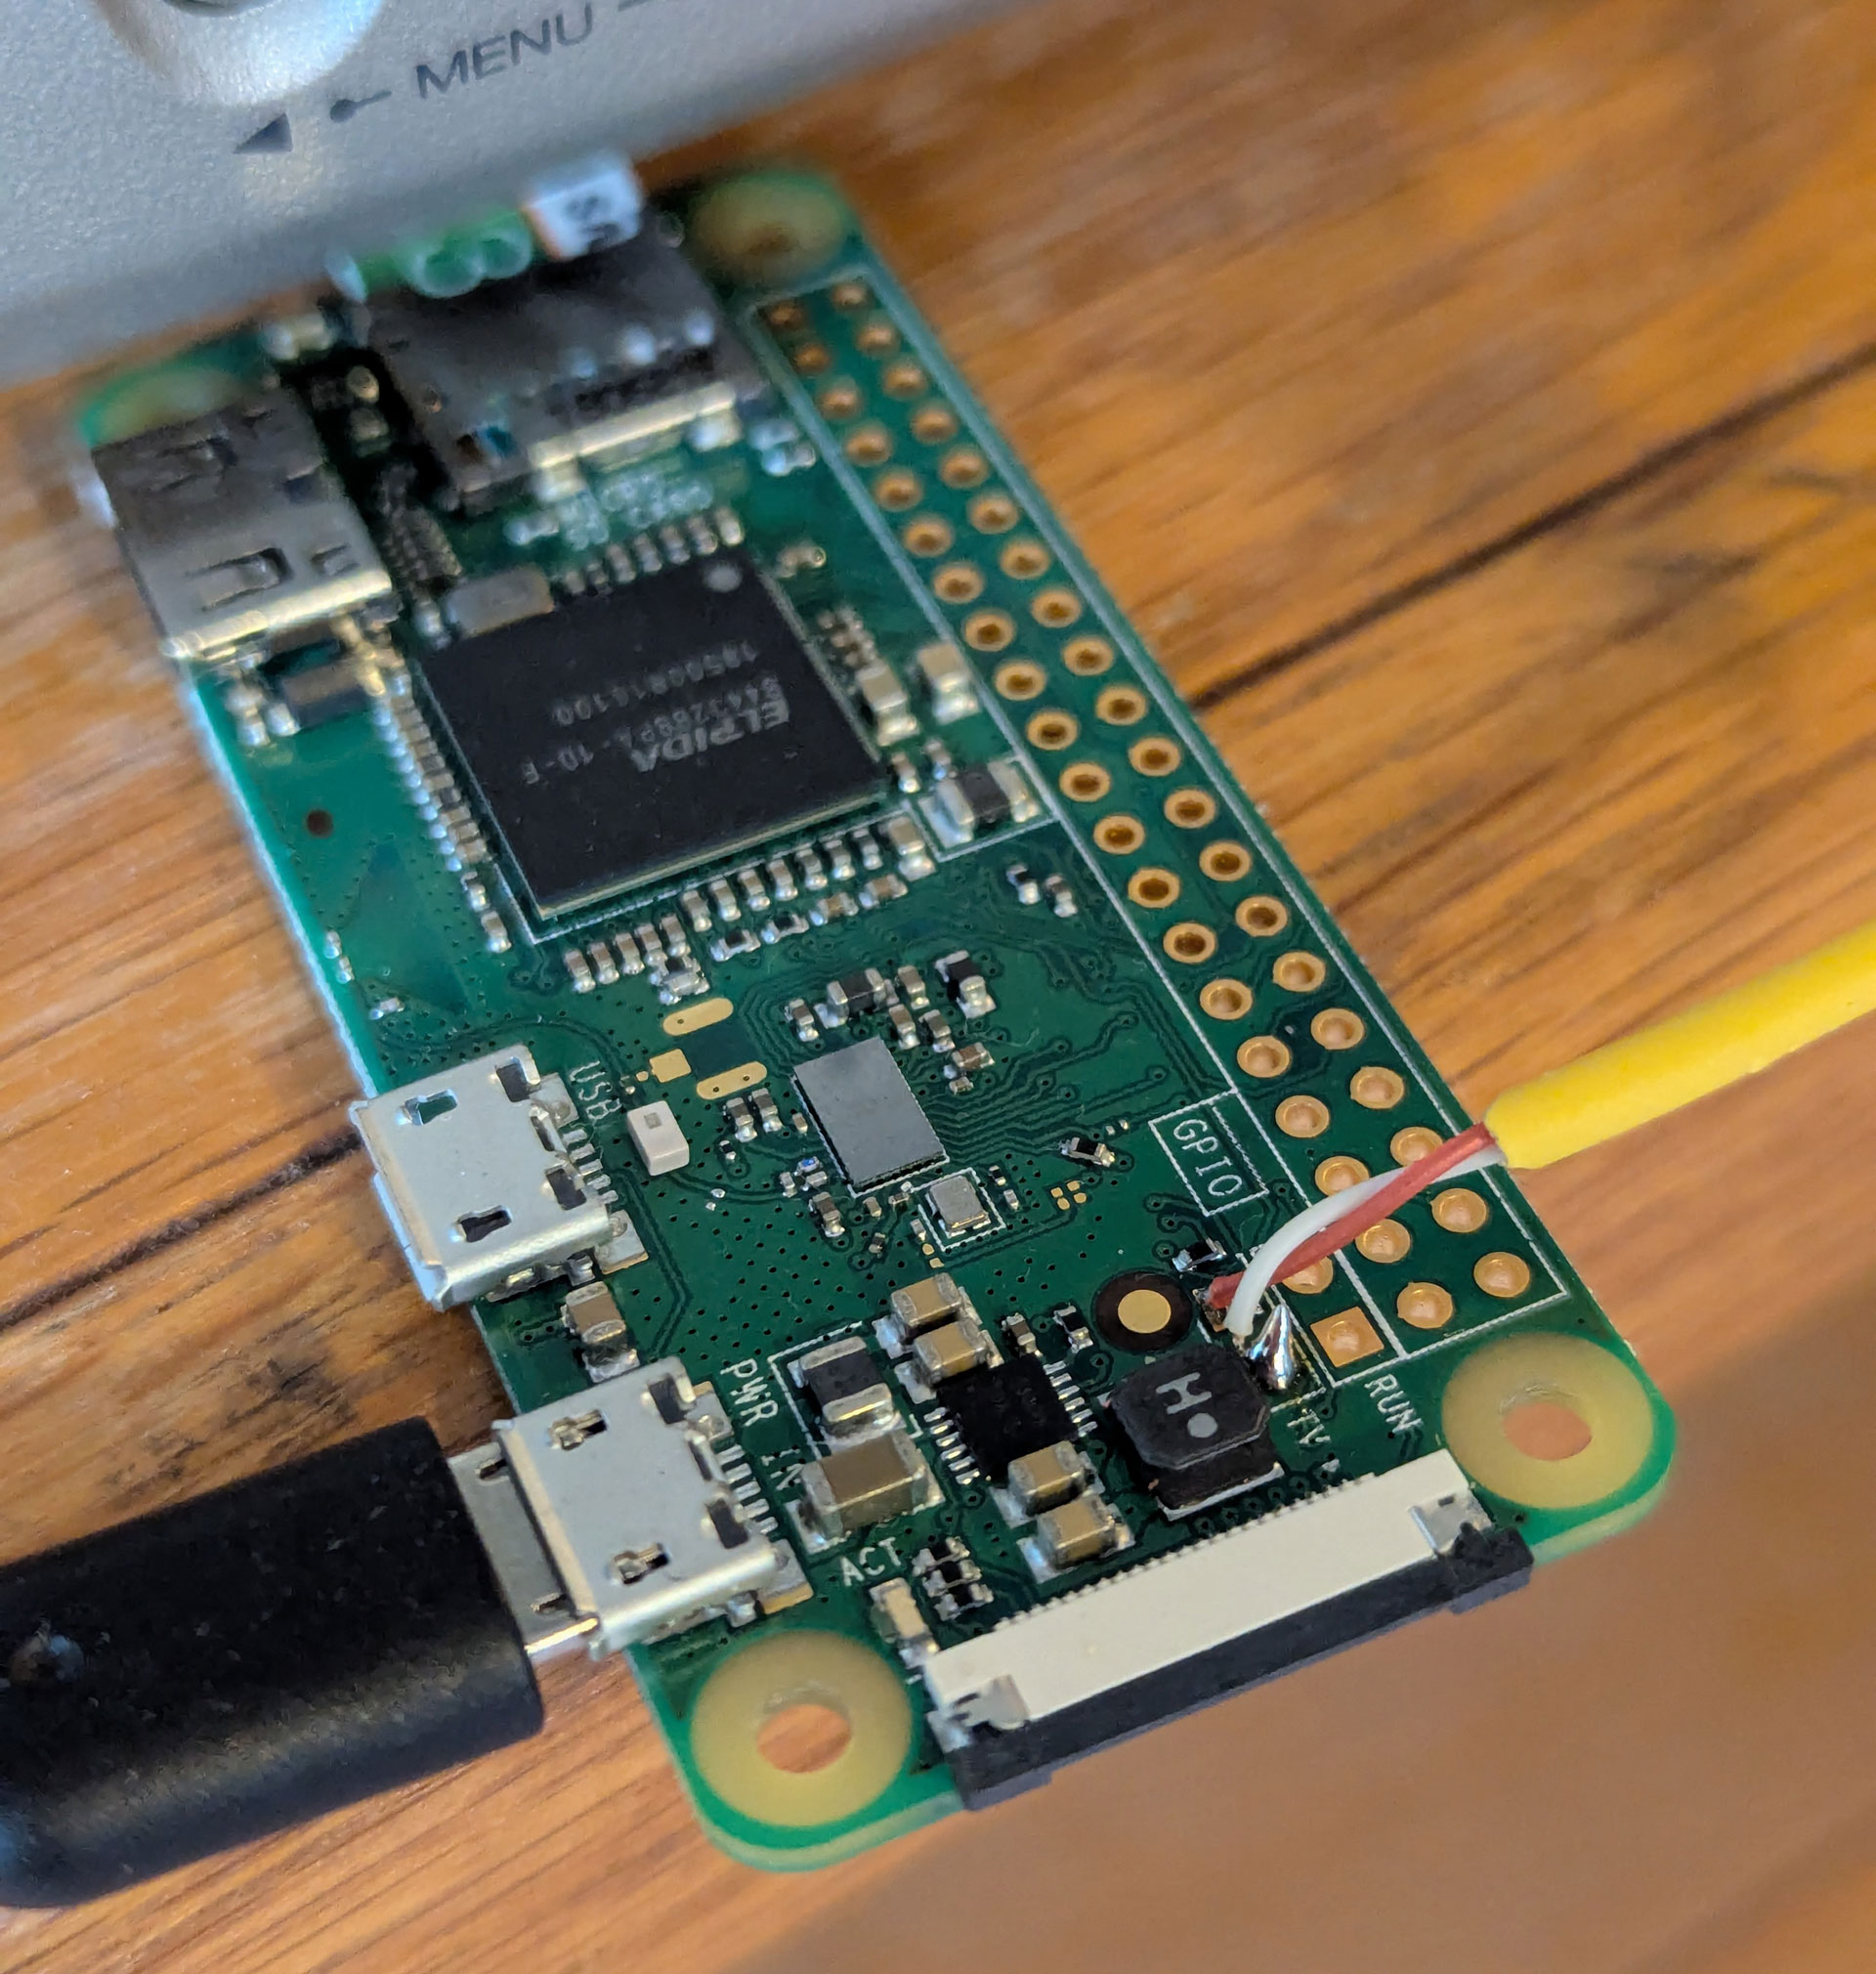
After a little research, I discovered that the Raspberry Pi Zero W can output analog video with no adapters or additional hardware, just by soldering an RCA cable to some pads on the board. It just so happens that I have a box of unused cables (who doesn't?) that I could harvest one from, so I cut the end off, stripped the wires, and soldered it to the board. Actually, before soldering, I tested it by holding the wires to the pads by hand to make sure it would work: it pays to be careful. Eventually, though, I had my Raspberry Pi Zero W outputting a signal to the TV.
Then I had to make it display something. I determined that I could use a command called fbi (Frame Buffer Imageviewer) to display an image on the screen without having to run any graphical interface on the Pi—the Zero W can technically run a lightweight version of Rasbpian Desktop but I didn't want to mess with that as I was just controlling it remotely over ssh. With fbi, I could pursue the following somewhat crude methodology to develop my clock program: on a certain interval, generate a full 320x240 image showing the time, save it as a file, then display that file using fbi. The result is an endless slideshow of images displaying the time which are generated randomly using different sets of component images.
I decided to write my program in Python; I don't know why—because I don't really like Python—but to me when working with a Raspberry Pi and trying to get something working quickly, it just seemed like the right choice. In an infinite loop, it retrieves the various components of the time (i.e. the hours, the minutes tens place, the minutes ones place, AM/PM), and grabs a corresponding random image file for each component. It then overlays those components on a background image from a set of black and white pictures I resized to 320x240. I use the PIL Image library to do the actual creation of the image. Lastly, if the user has added the display argument, the python script runs fbi to cast the image to the screen. I uploaded the script to my Raspberry Pi and set up a cron task to run it on startup, and we were in business.
Link to Source RepositoryBelow is an example image generated with the clock program:
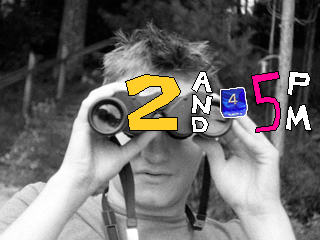
This is the direct output of the python script before it's displayed on the screen.
As mentioned in the implementation section, the images used as the background are all black and white photos I took on film cameras and developed myself over the years. I had to resize them to my chosen resolution of 320x240, which was an interesting exercise. The low resolution, smoothed over by the fuzziness of the CRT, meant that in some cases I cropped the images in quite a bit to preserve the detail in the subject.
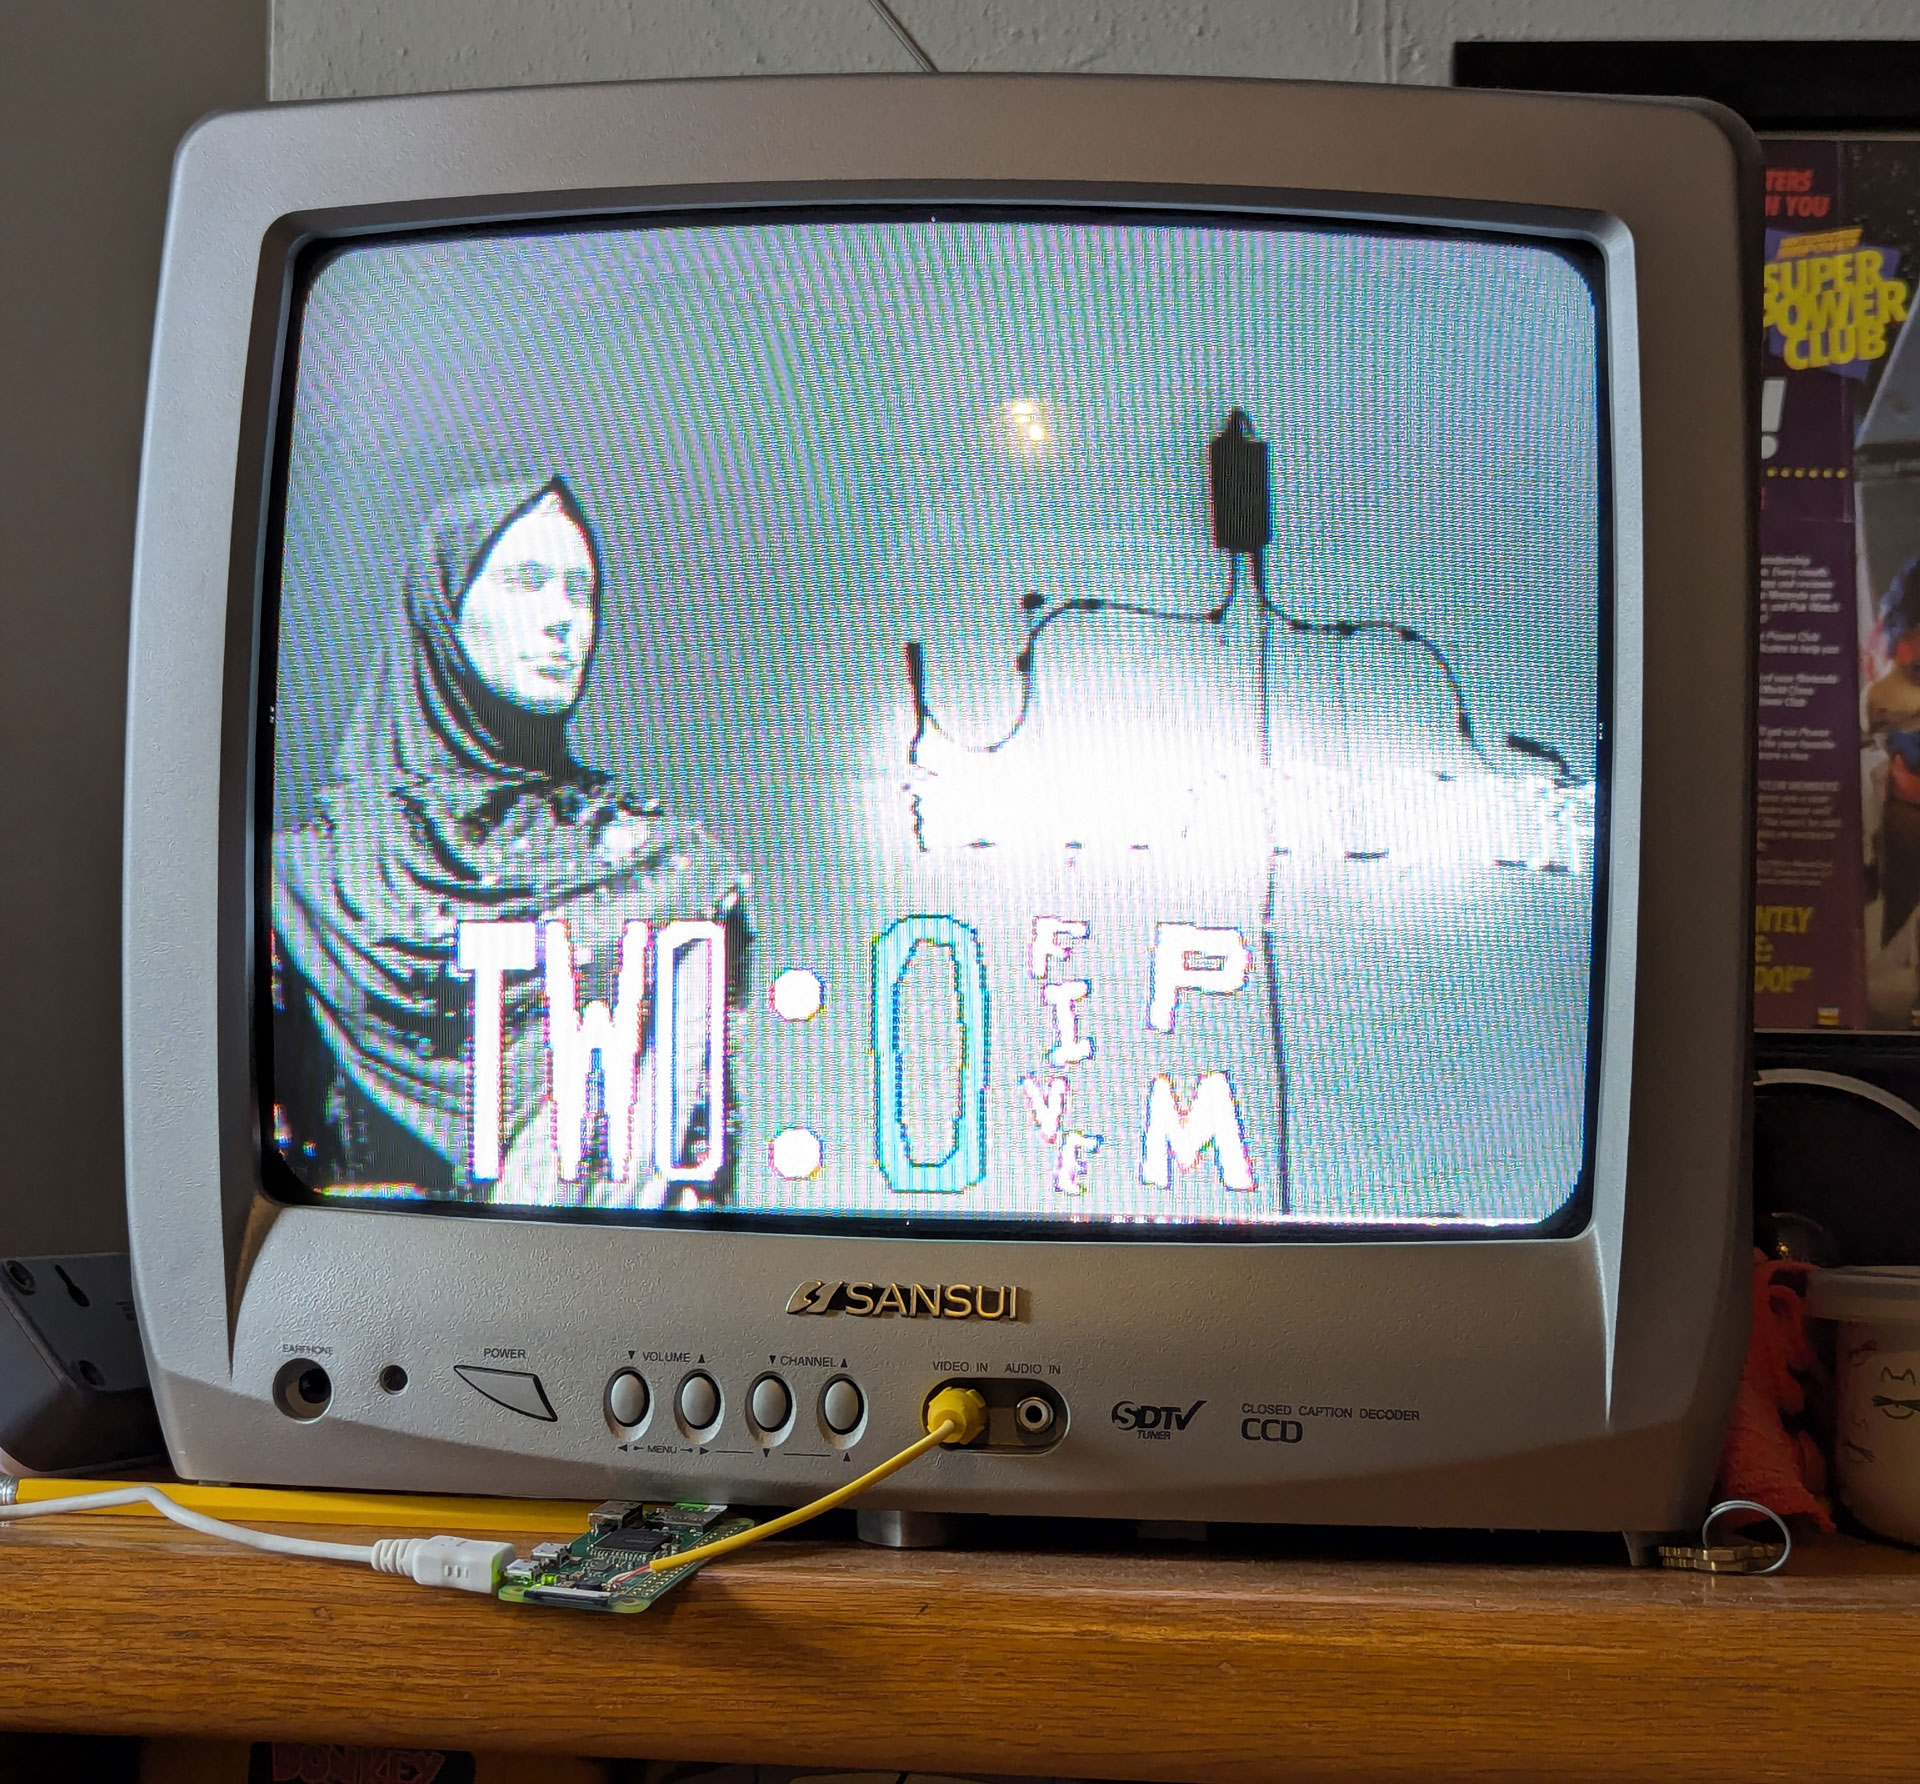
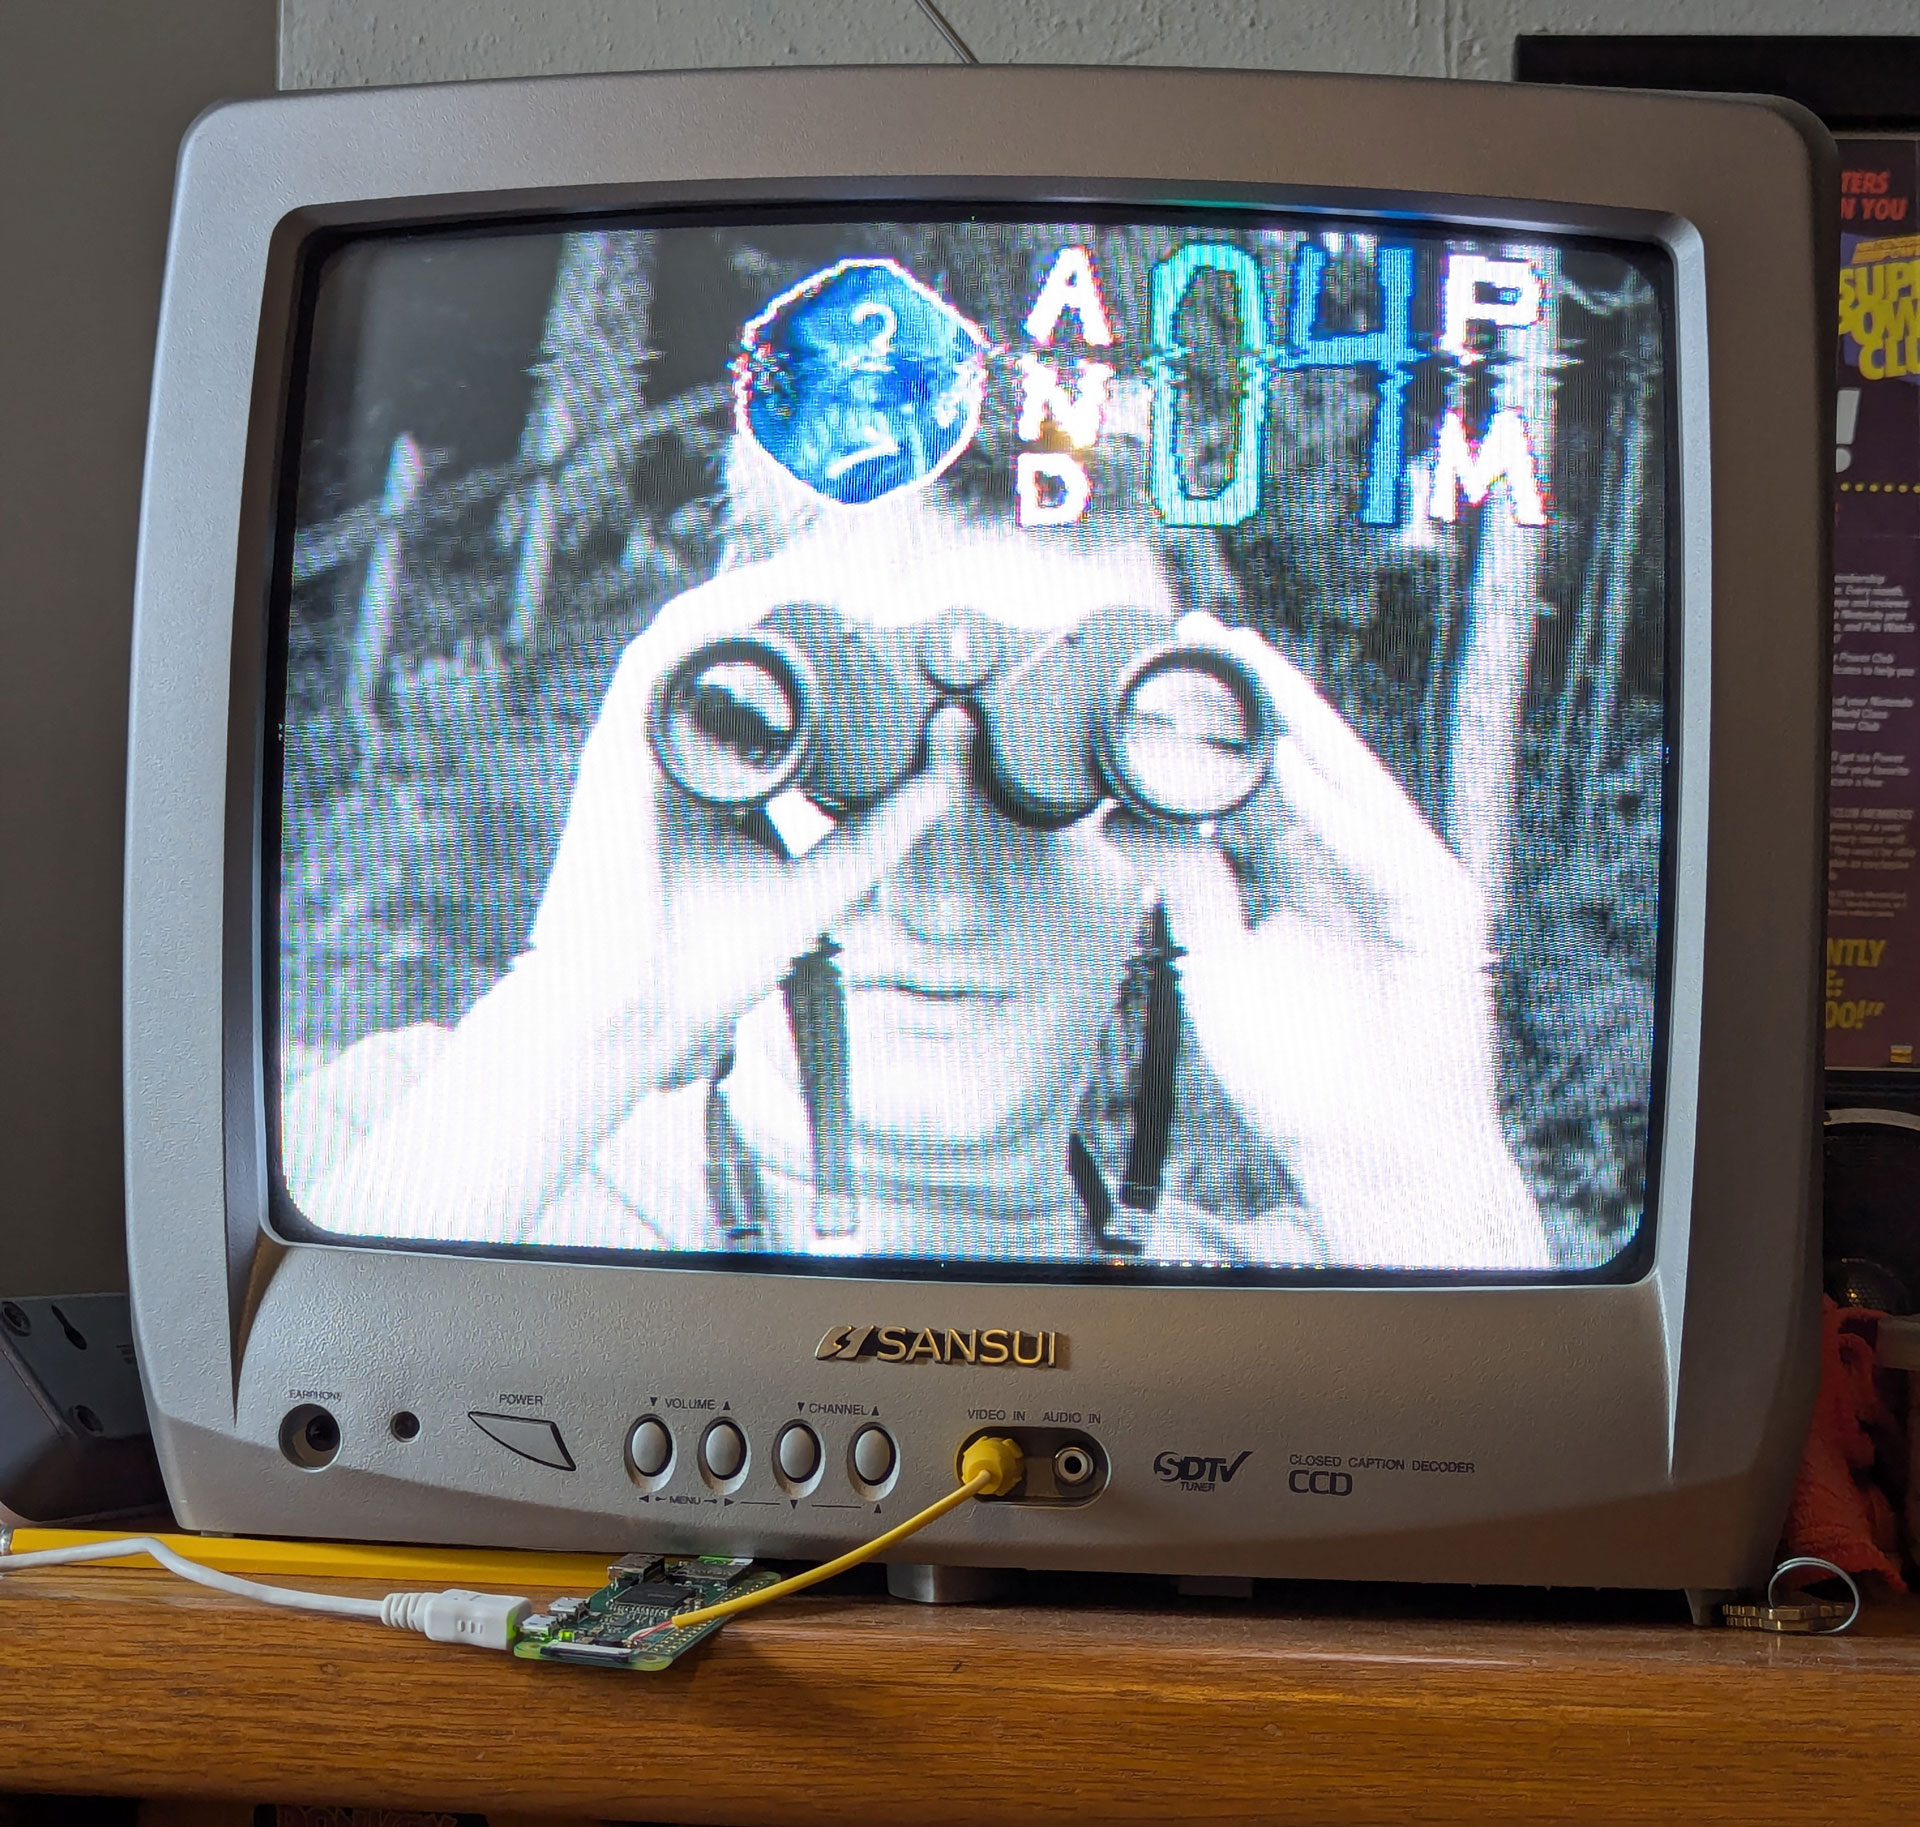
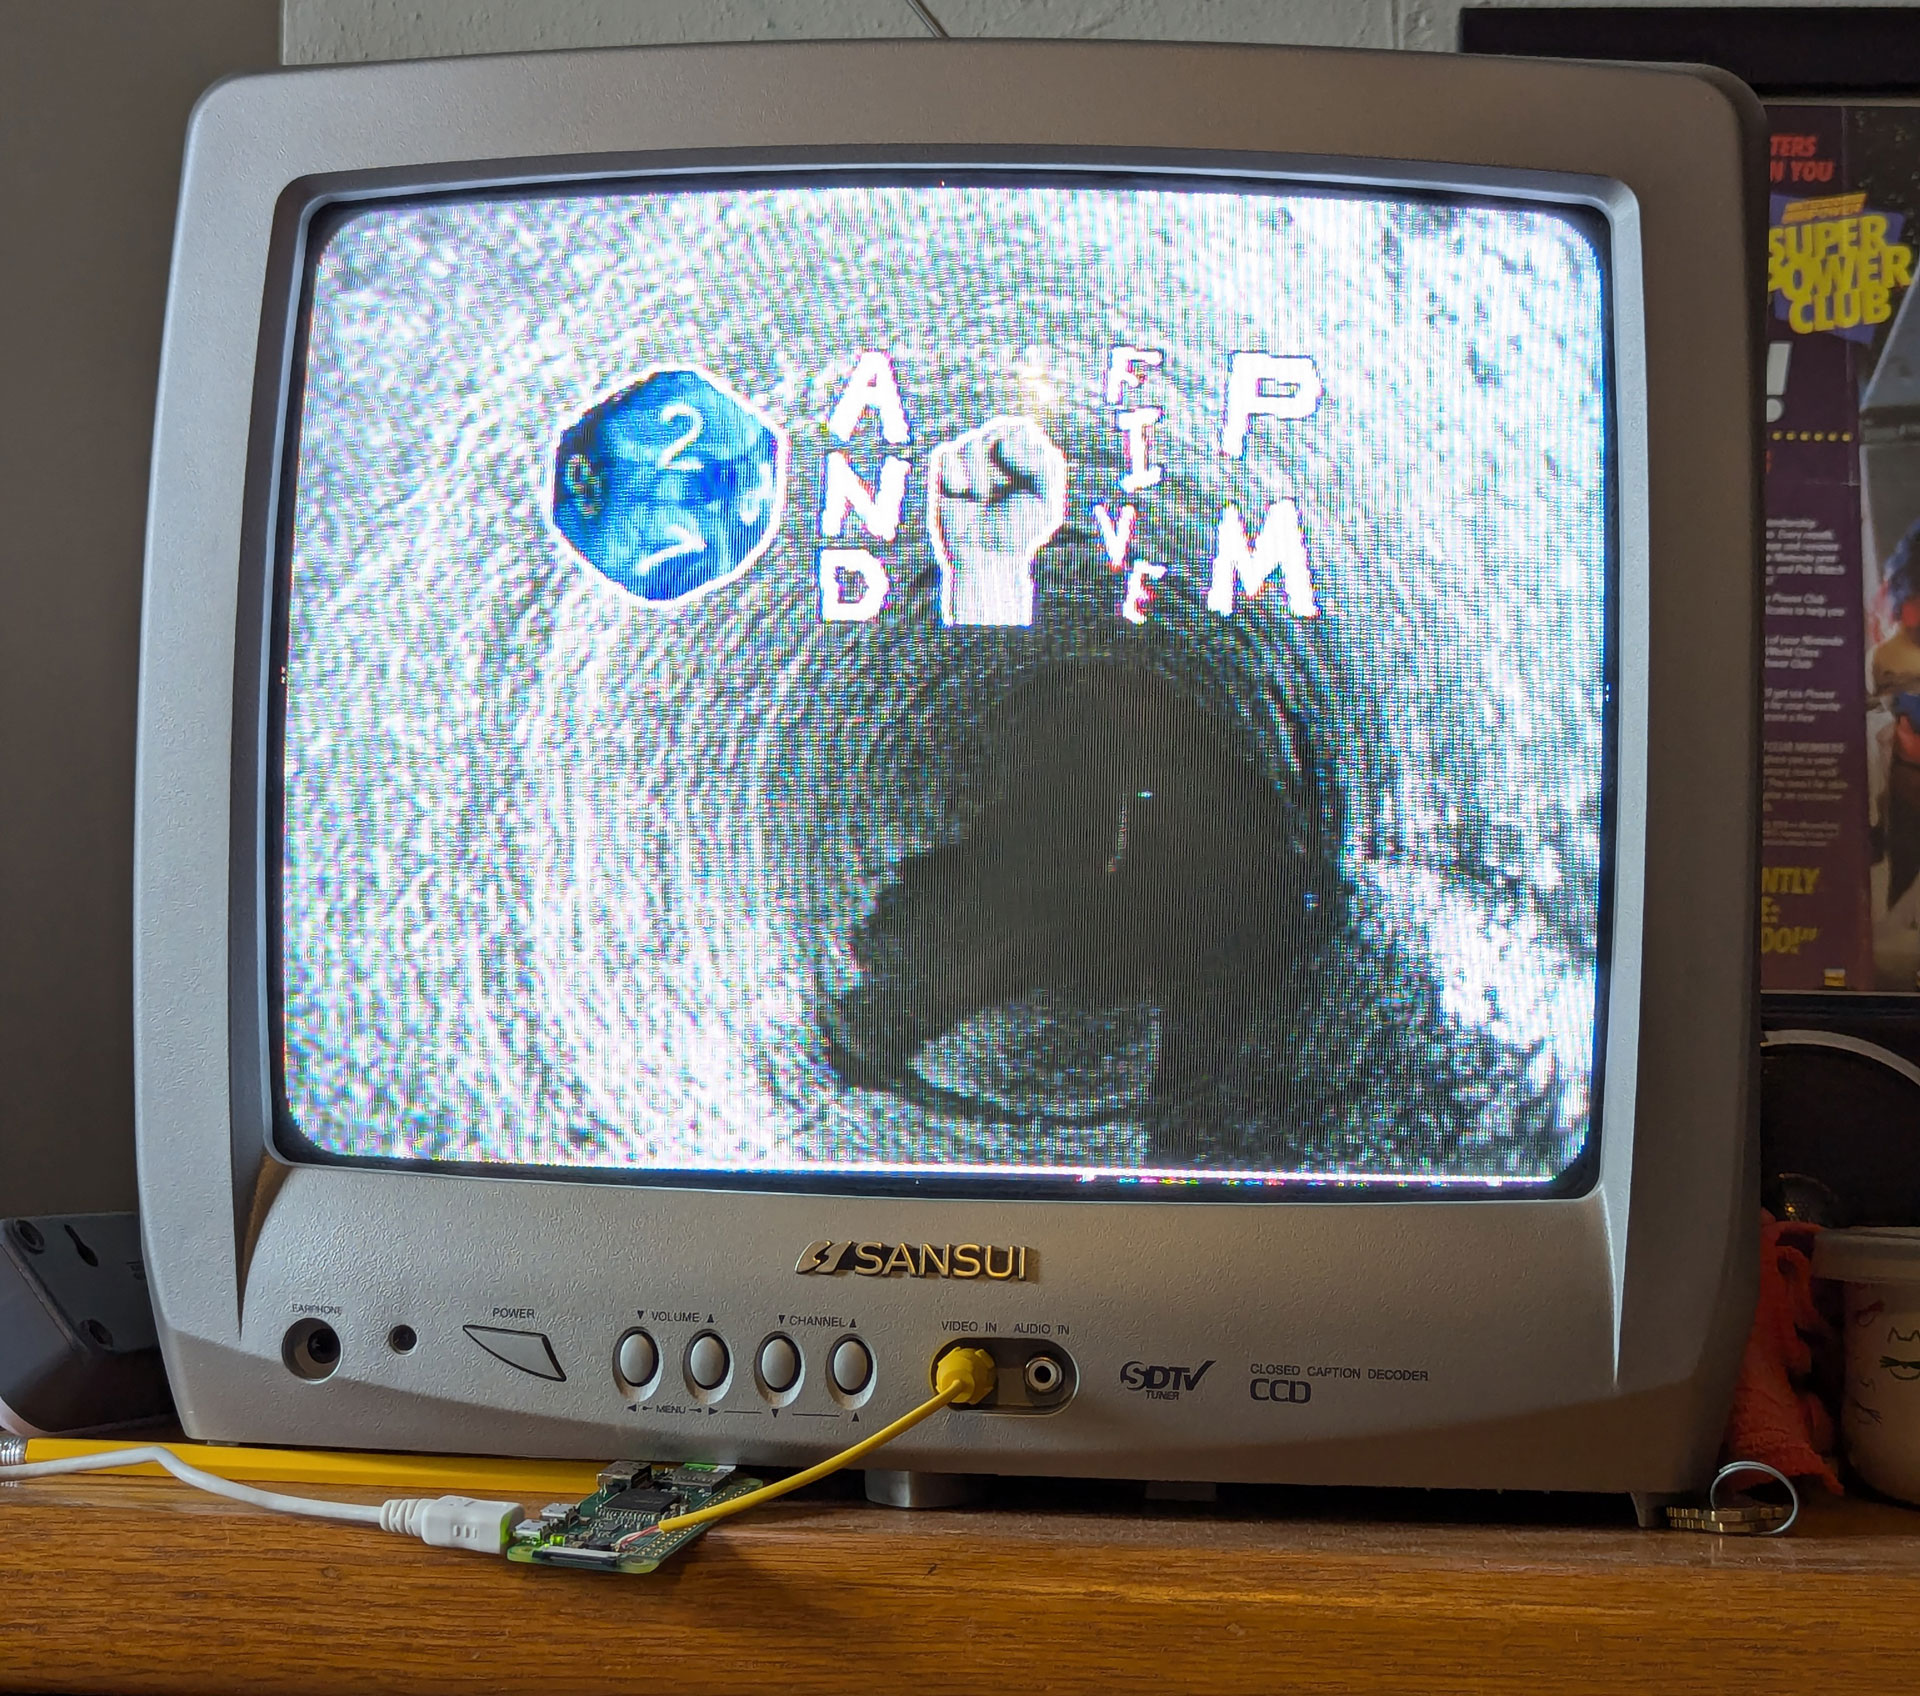
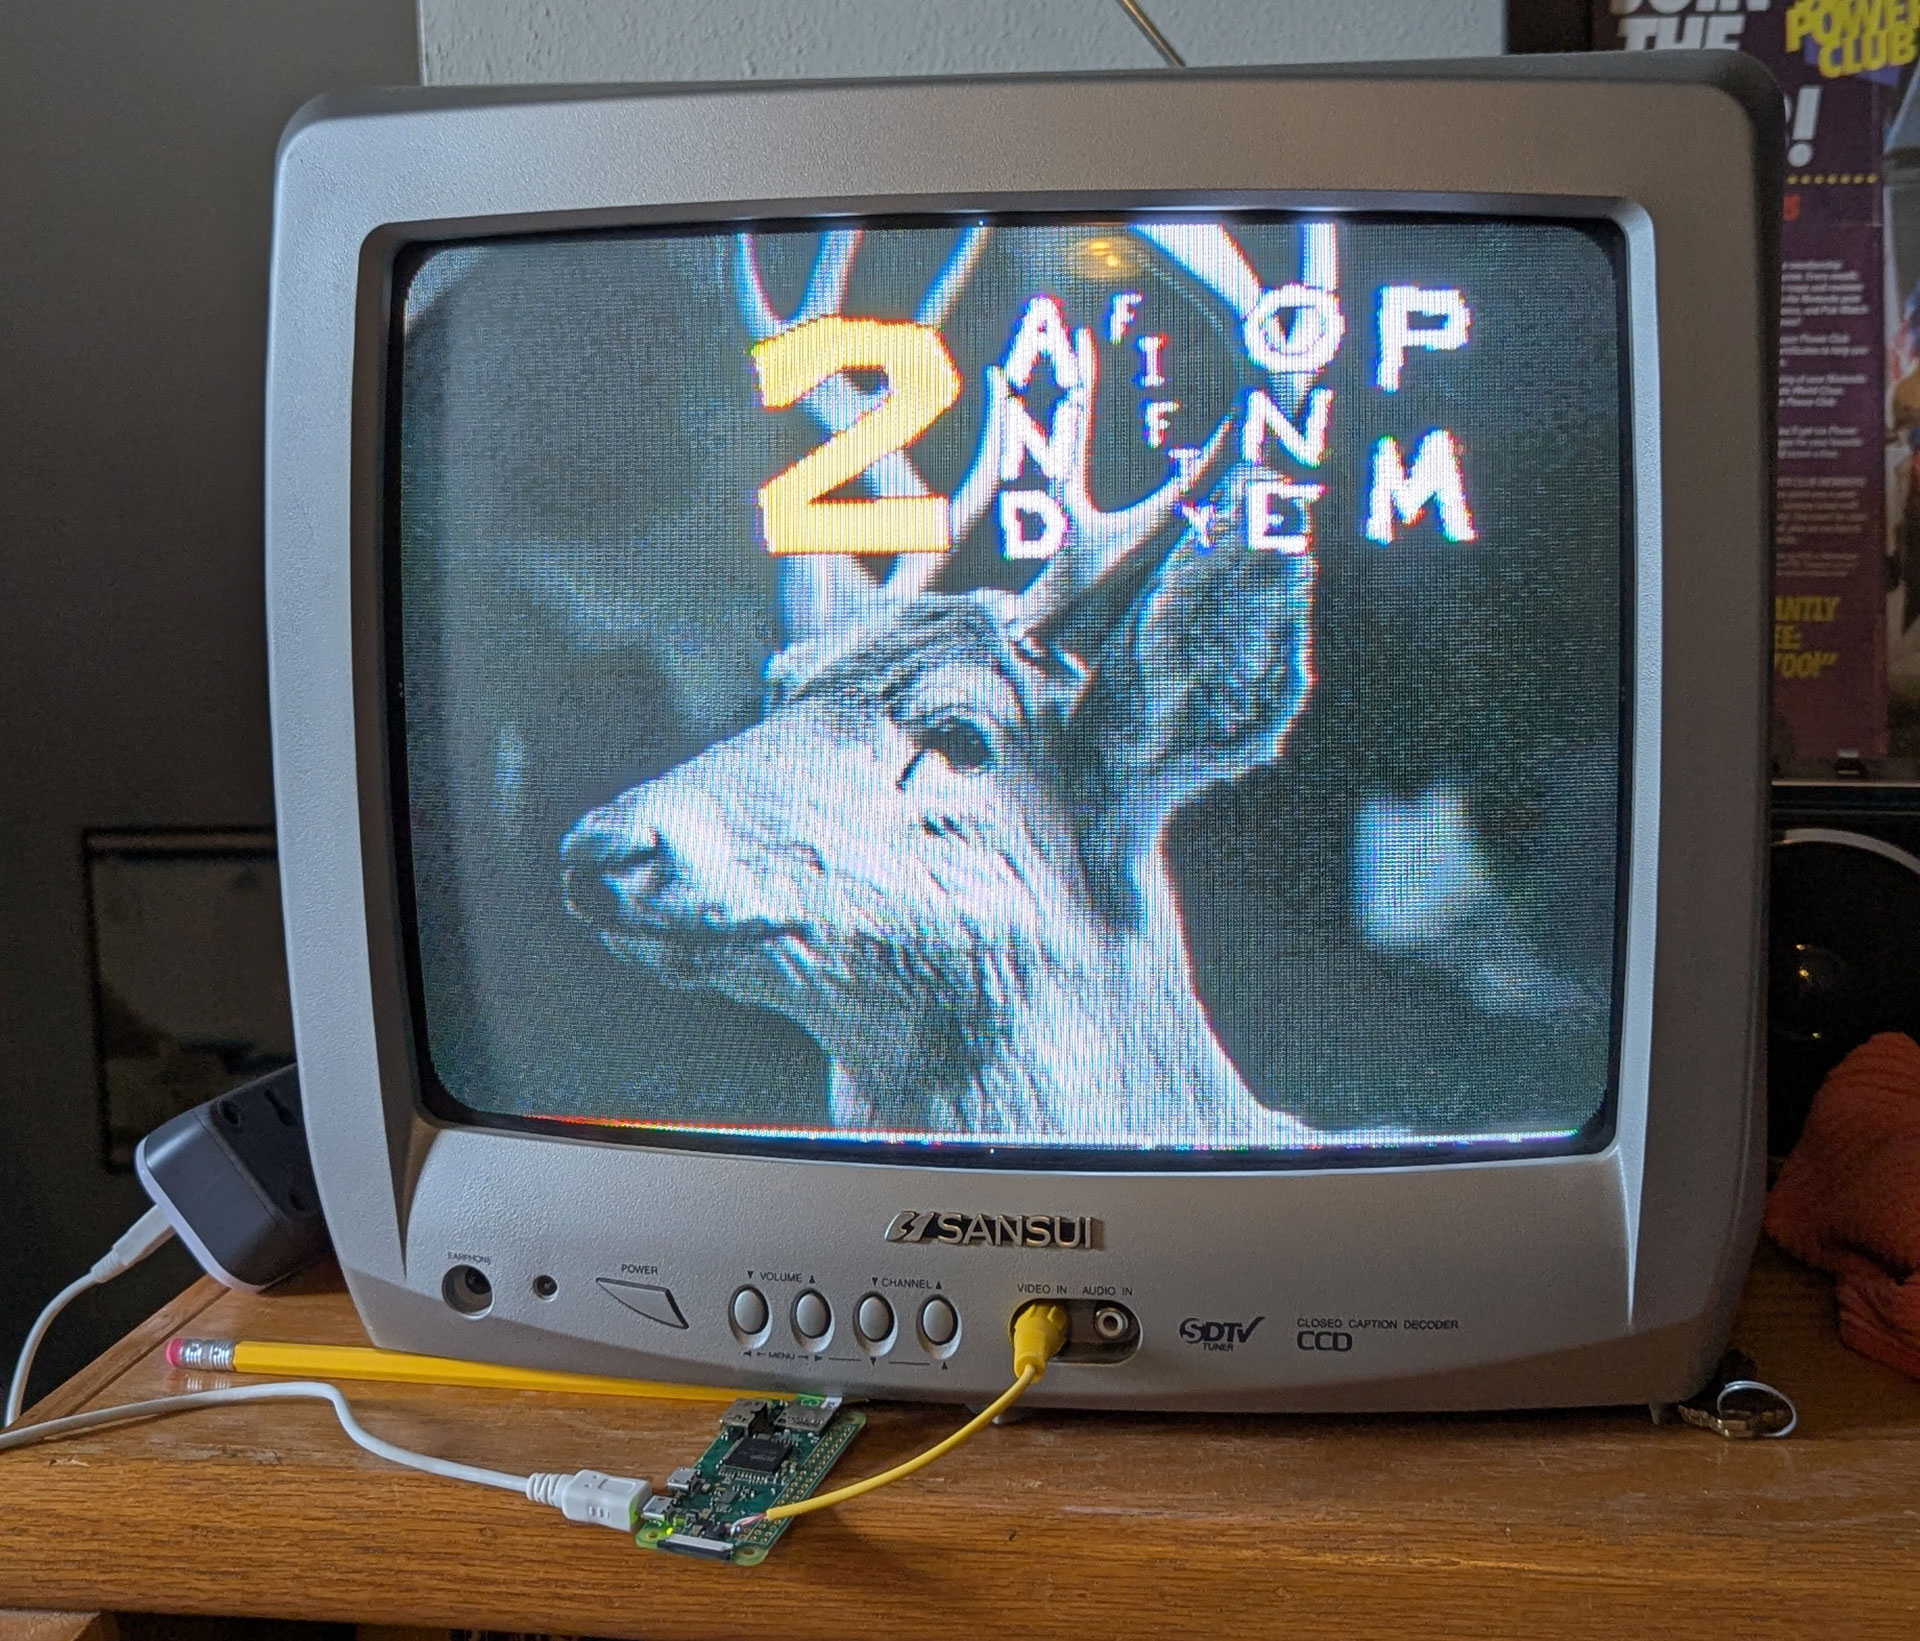
The hours are single 64x64 sprites, and the minutes are composed of two 32x64 sprites (one for the tens, and one for the ones). There's a 32x64 sprite for the colon/separator between the hours and minutes, and another for the AM/PM designation, all combining to one 196x64 time display. All the time sprites have transparency. The sprites showing the time are placed randomly somewhere over the top of the background image.
I started out by making all the different numbers in a large, blocky, "toon" style. Then, I added a "text" version by actually writing out the word for the number in English. In some cases, I had to get creative with how to fit the text in the small sprite. Then, I looked for some more creative ways to represent the numbers, and ultimately added some pixel-y photos of my hands (raising the appropriate number of fingers) for the minute tens place (which maps nicely to the fingers on the typical human hand), and some pixel-y photos of dice (from a D12 and a D6 respectively) for the hours and minute tens. In both cases, I had to resize the photos to a miniscule proportion and carefully cut out their backgrounds and outline them. The resulting sprites pleasantly remind me of Dr. Crygor's microgames from the original WarioWare for the GameBoy Advance.
Lastly, there is some "Flavor Text" which appears every once and a while in the top left corner of the images. I thought of this concept to add another element of randomness and give the resulting images a bit of a postcard or image macro aesthetic. When I added this text, I realized that the overscan on my television was not set up correctly and the corner was getting cut off, and after failing to fix it, I ended up just bumping everything in ten pixels to compensate.
When planning this writeup, I thought it would be better to include a dynamic version of the clock that could display in browser in addition to screenshots and pictures of the clock in action. I originally considered running the python script on my server and just displaying the resulting images in an automatically refreshing container on this page, but I decided to rewrite the script in Javascript instead so it can run in the user's local timezone. You can view the clock running in your browser here:
This was an interesting project, but not one I'm totally satisfied with. The art style is fun, in my opinion, but some of the additional ways I've chosen to represent the time transcend quirkiness to the point of being indecipherable. Additionally, I would have liked to include more sprites/fonts showing the time in different styles (in a legible way).
The Raspberry Pi is also perhaps not the best way to achieve this result as well. Hypothetically, it would be perfect: it connects to the Internet to get accurate time, it's capable of outputting the video, and was cheap and consumes very little power. That said, it takes a very long time to start up and with no RF shielding and my admittedly poor solder job, there's a lot of noise in the video signal. Additionally, the process seems to crash or stop sometimes; I'm not sure if that's a bug in the script or an issue with the Raspberry Pi or how I've configured it to run on startup. I never saw any issues while testing it on my main PC, so I think it must be a problem specific to the Pi or when using fbi.
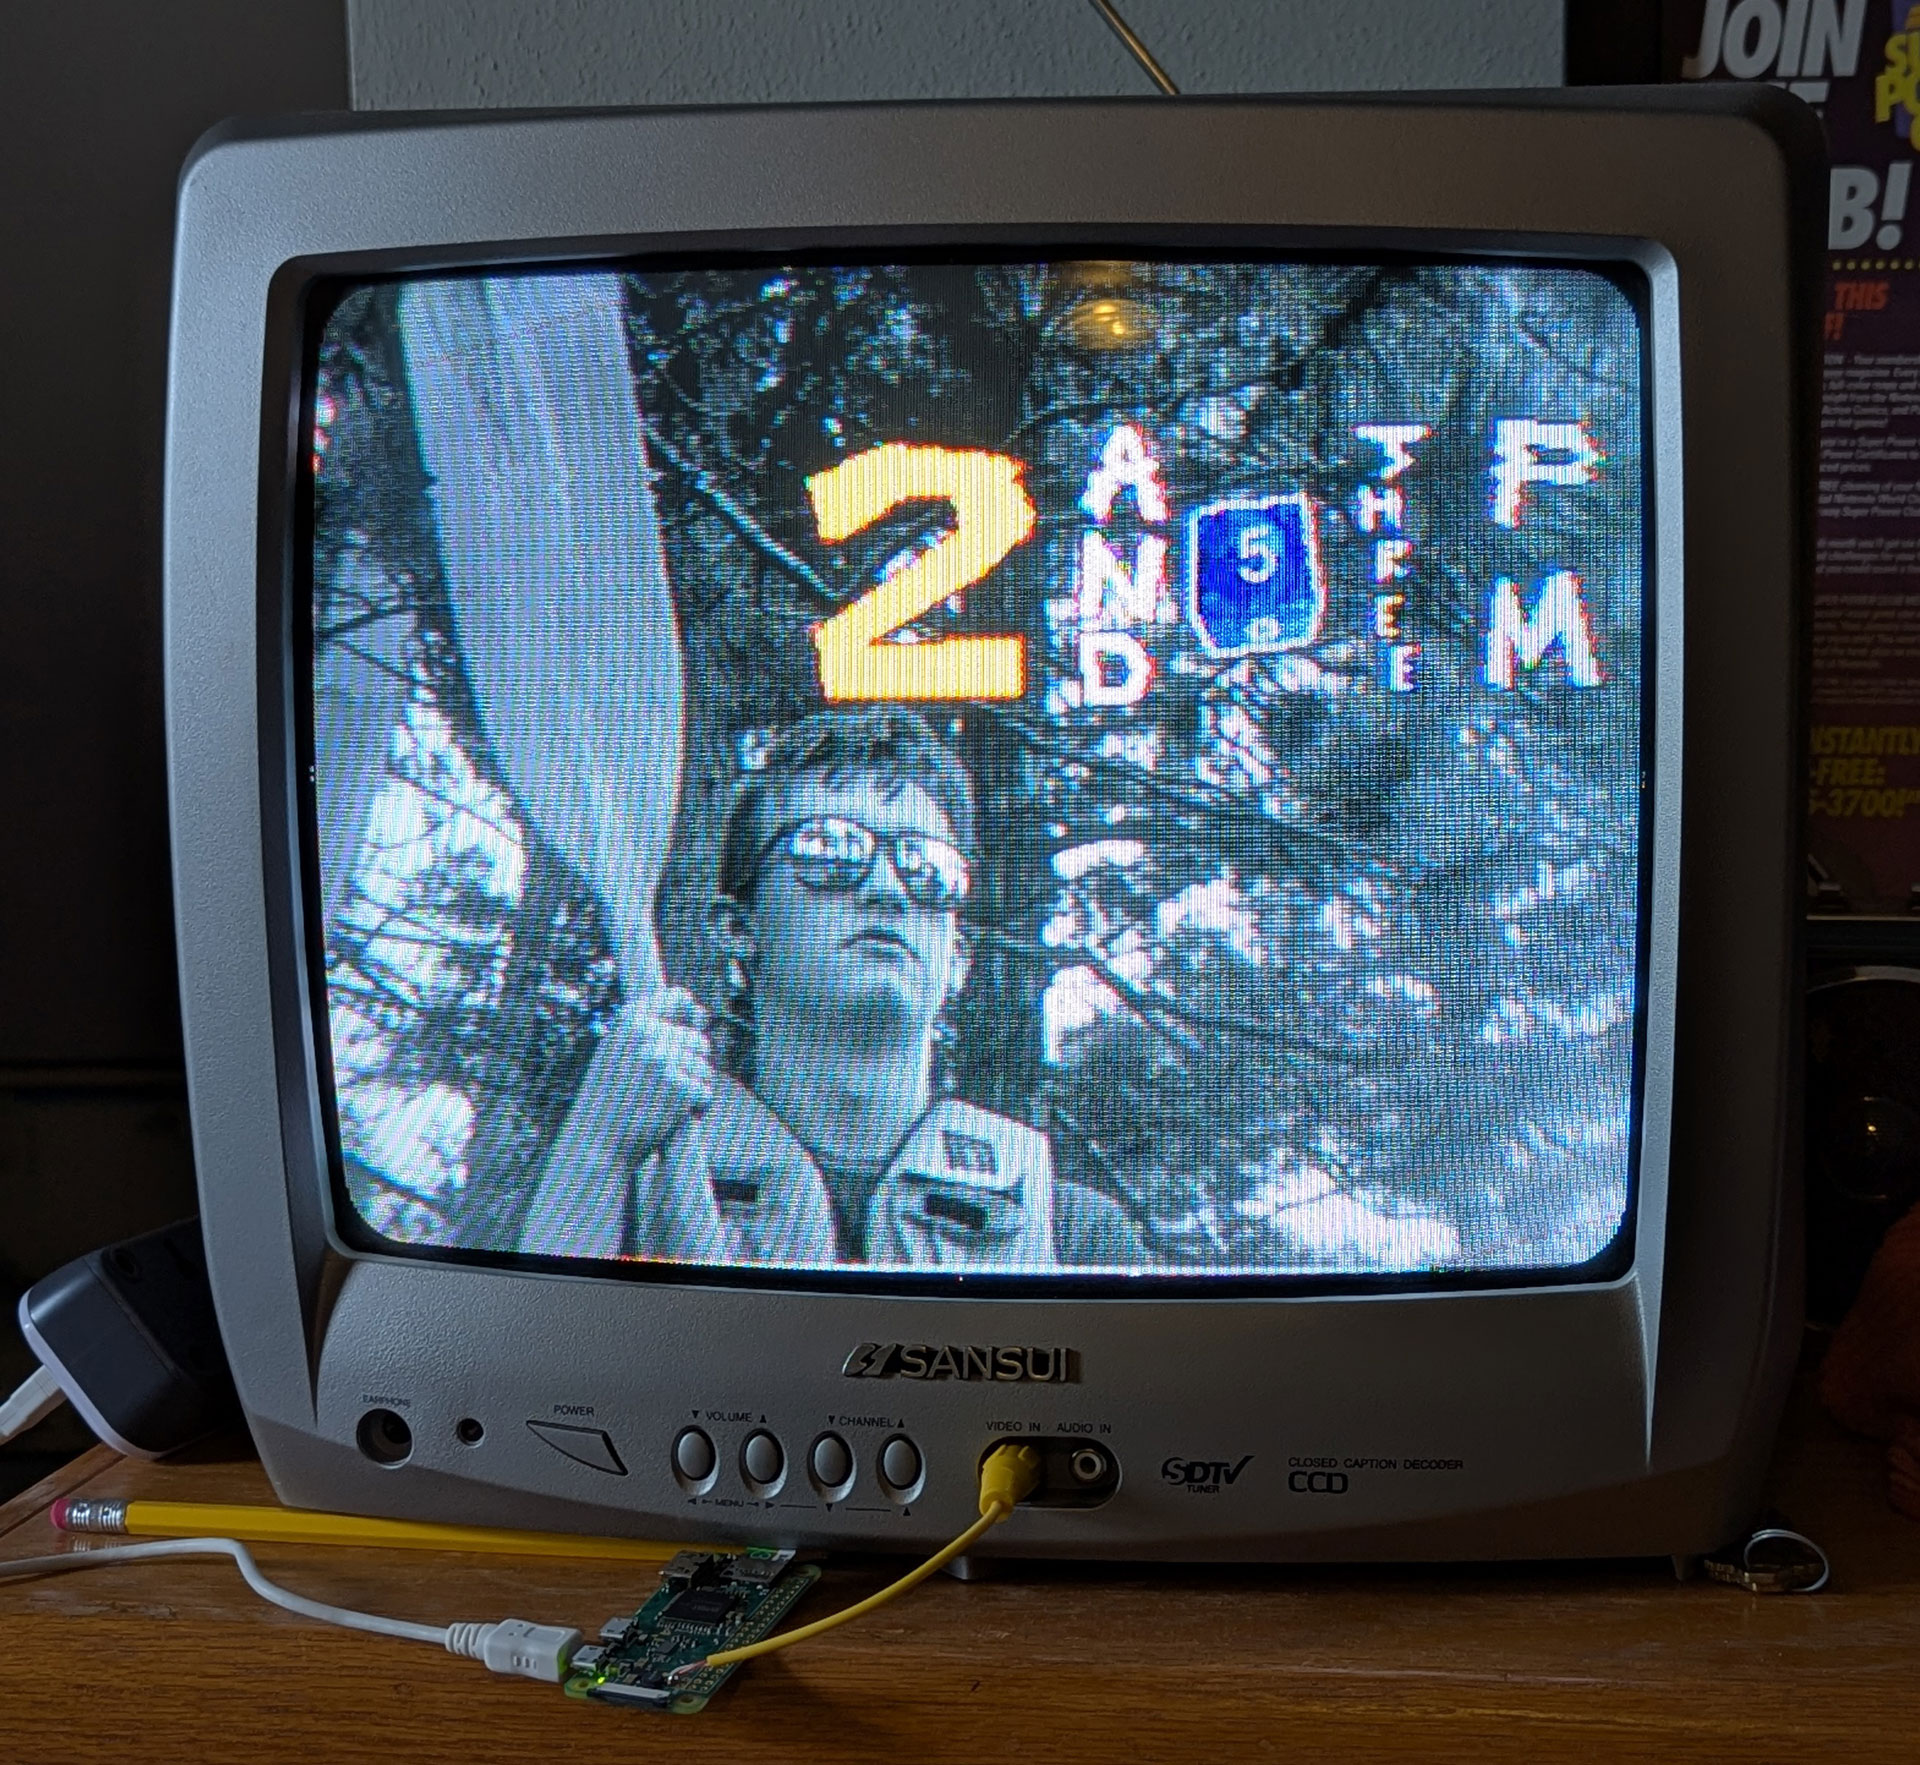
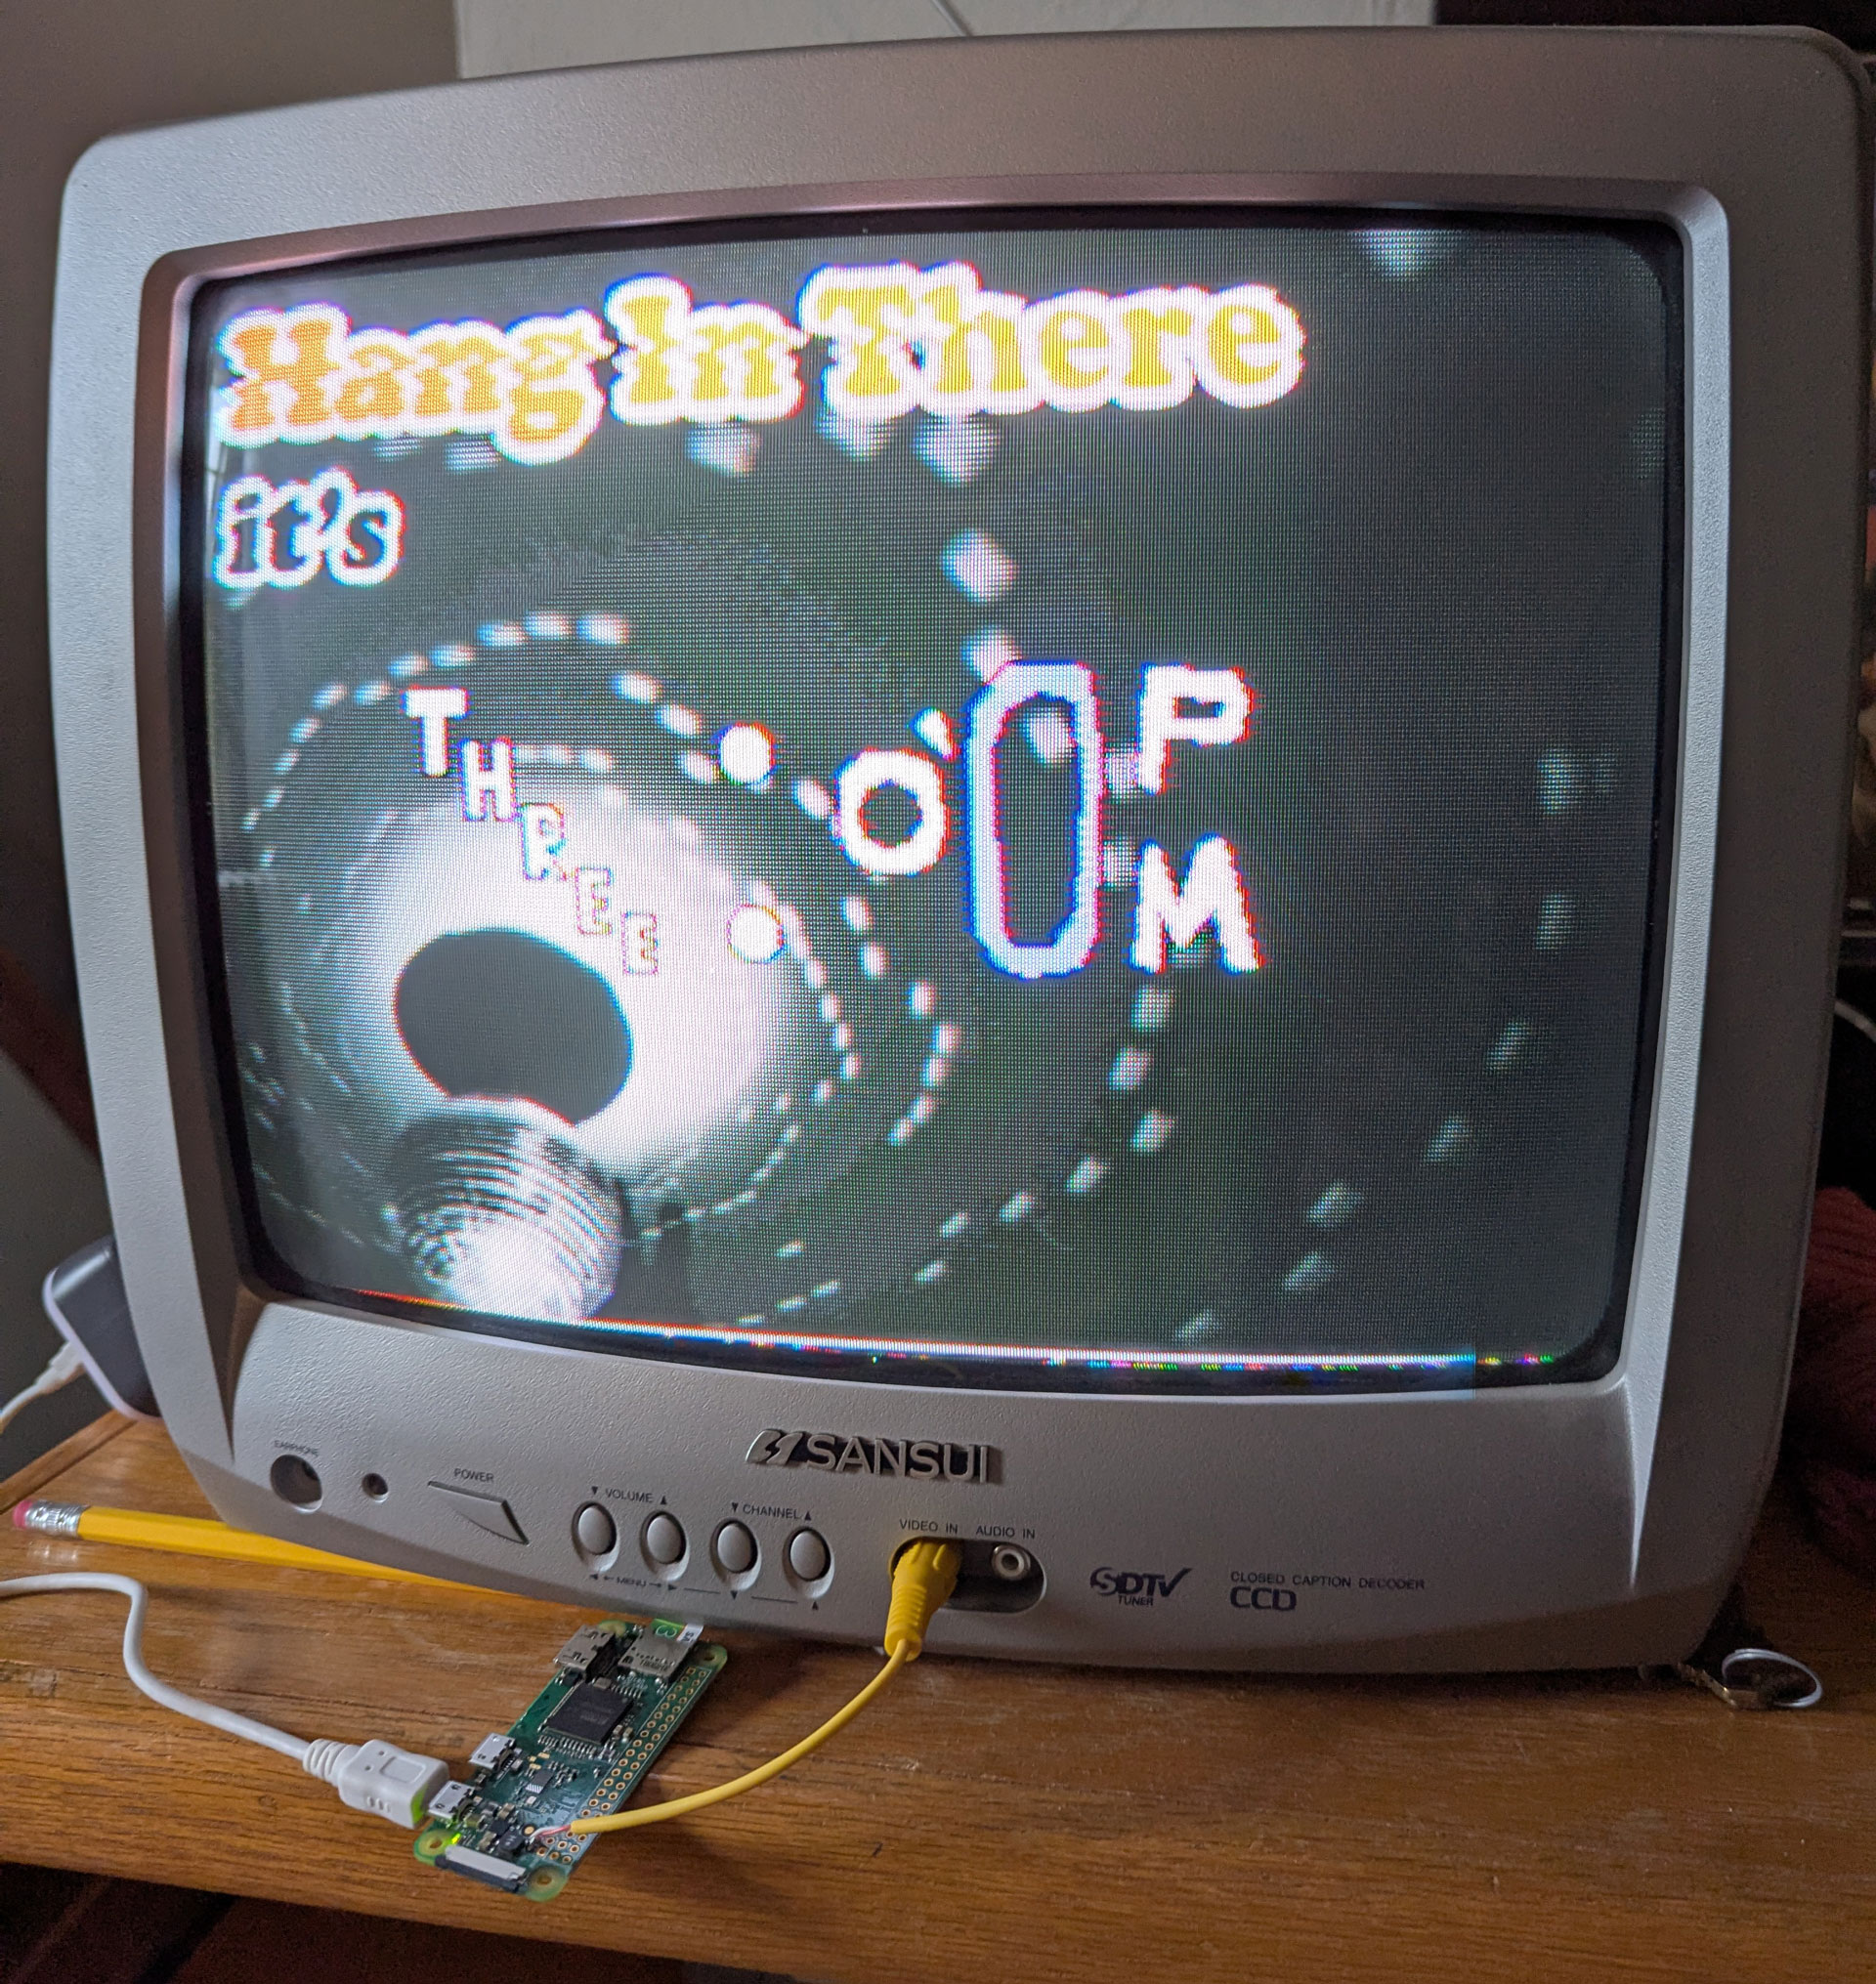
Here are some additional photos of the clock in action on my television showing a few more variations. Of course, the dynamic version linked above will give a better idea of it, but this should show you the way the details look on the CRT, as well as the kind of noise/warping present on the image; that's not an issue with my TV: I think it's coming from interference on the video signal.